Create Webflow CMS entries with form submissions

One of the most requested features missing from Webflow is the submission of form data to its CMS.
Webflow is a very interesting tool for building websites in a codeless approach. It bridges the gap between developers and designers, as it allows you to create mockups and prototypes in html and css and its drag & drop platform allows you to visualize and manipulate CSS parameters.
Its CMS allows you to create hundreds of pages at a time thanks to its templates and also allows you to build collections to help you develop your business: launching your e-commerce, describing products and building forms to get customers more easily.
With so many features, it would be obvious to think that it would also allow its CMS to collect the information that a user puts into a form. But unfortunately, this can’t be done directly with Webflow, yet.
Striving for a smoother flow
Some weeks ago, we migrated YepCode webpage to Webflow, and we are delighted with the result.
We also included the Webflow integration (/docs/integrations/webflow/), and a bunch of recipes (https://yepcode.io/recipes/webflow/) to move information to and from this service.
In this post, we’ll discuss one of the most important aspects that Webflow lacks. Send form submission data to CMS
The basic steps of this guide are:
- Create the CMS Entry you want to be managed
- Create the form in Webflow to ask for the needed information
- Create a YepCode process that receives that form information and creates using Webflow API the CMS entry
- Configure Webflow to call the process webhook with each form submission
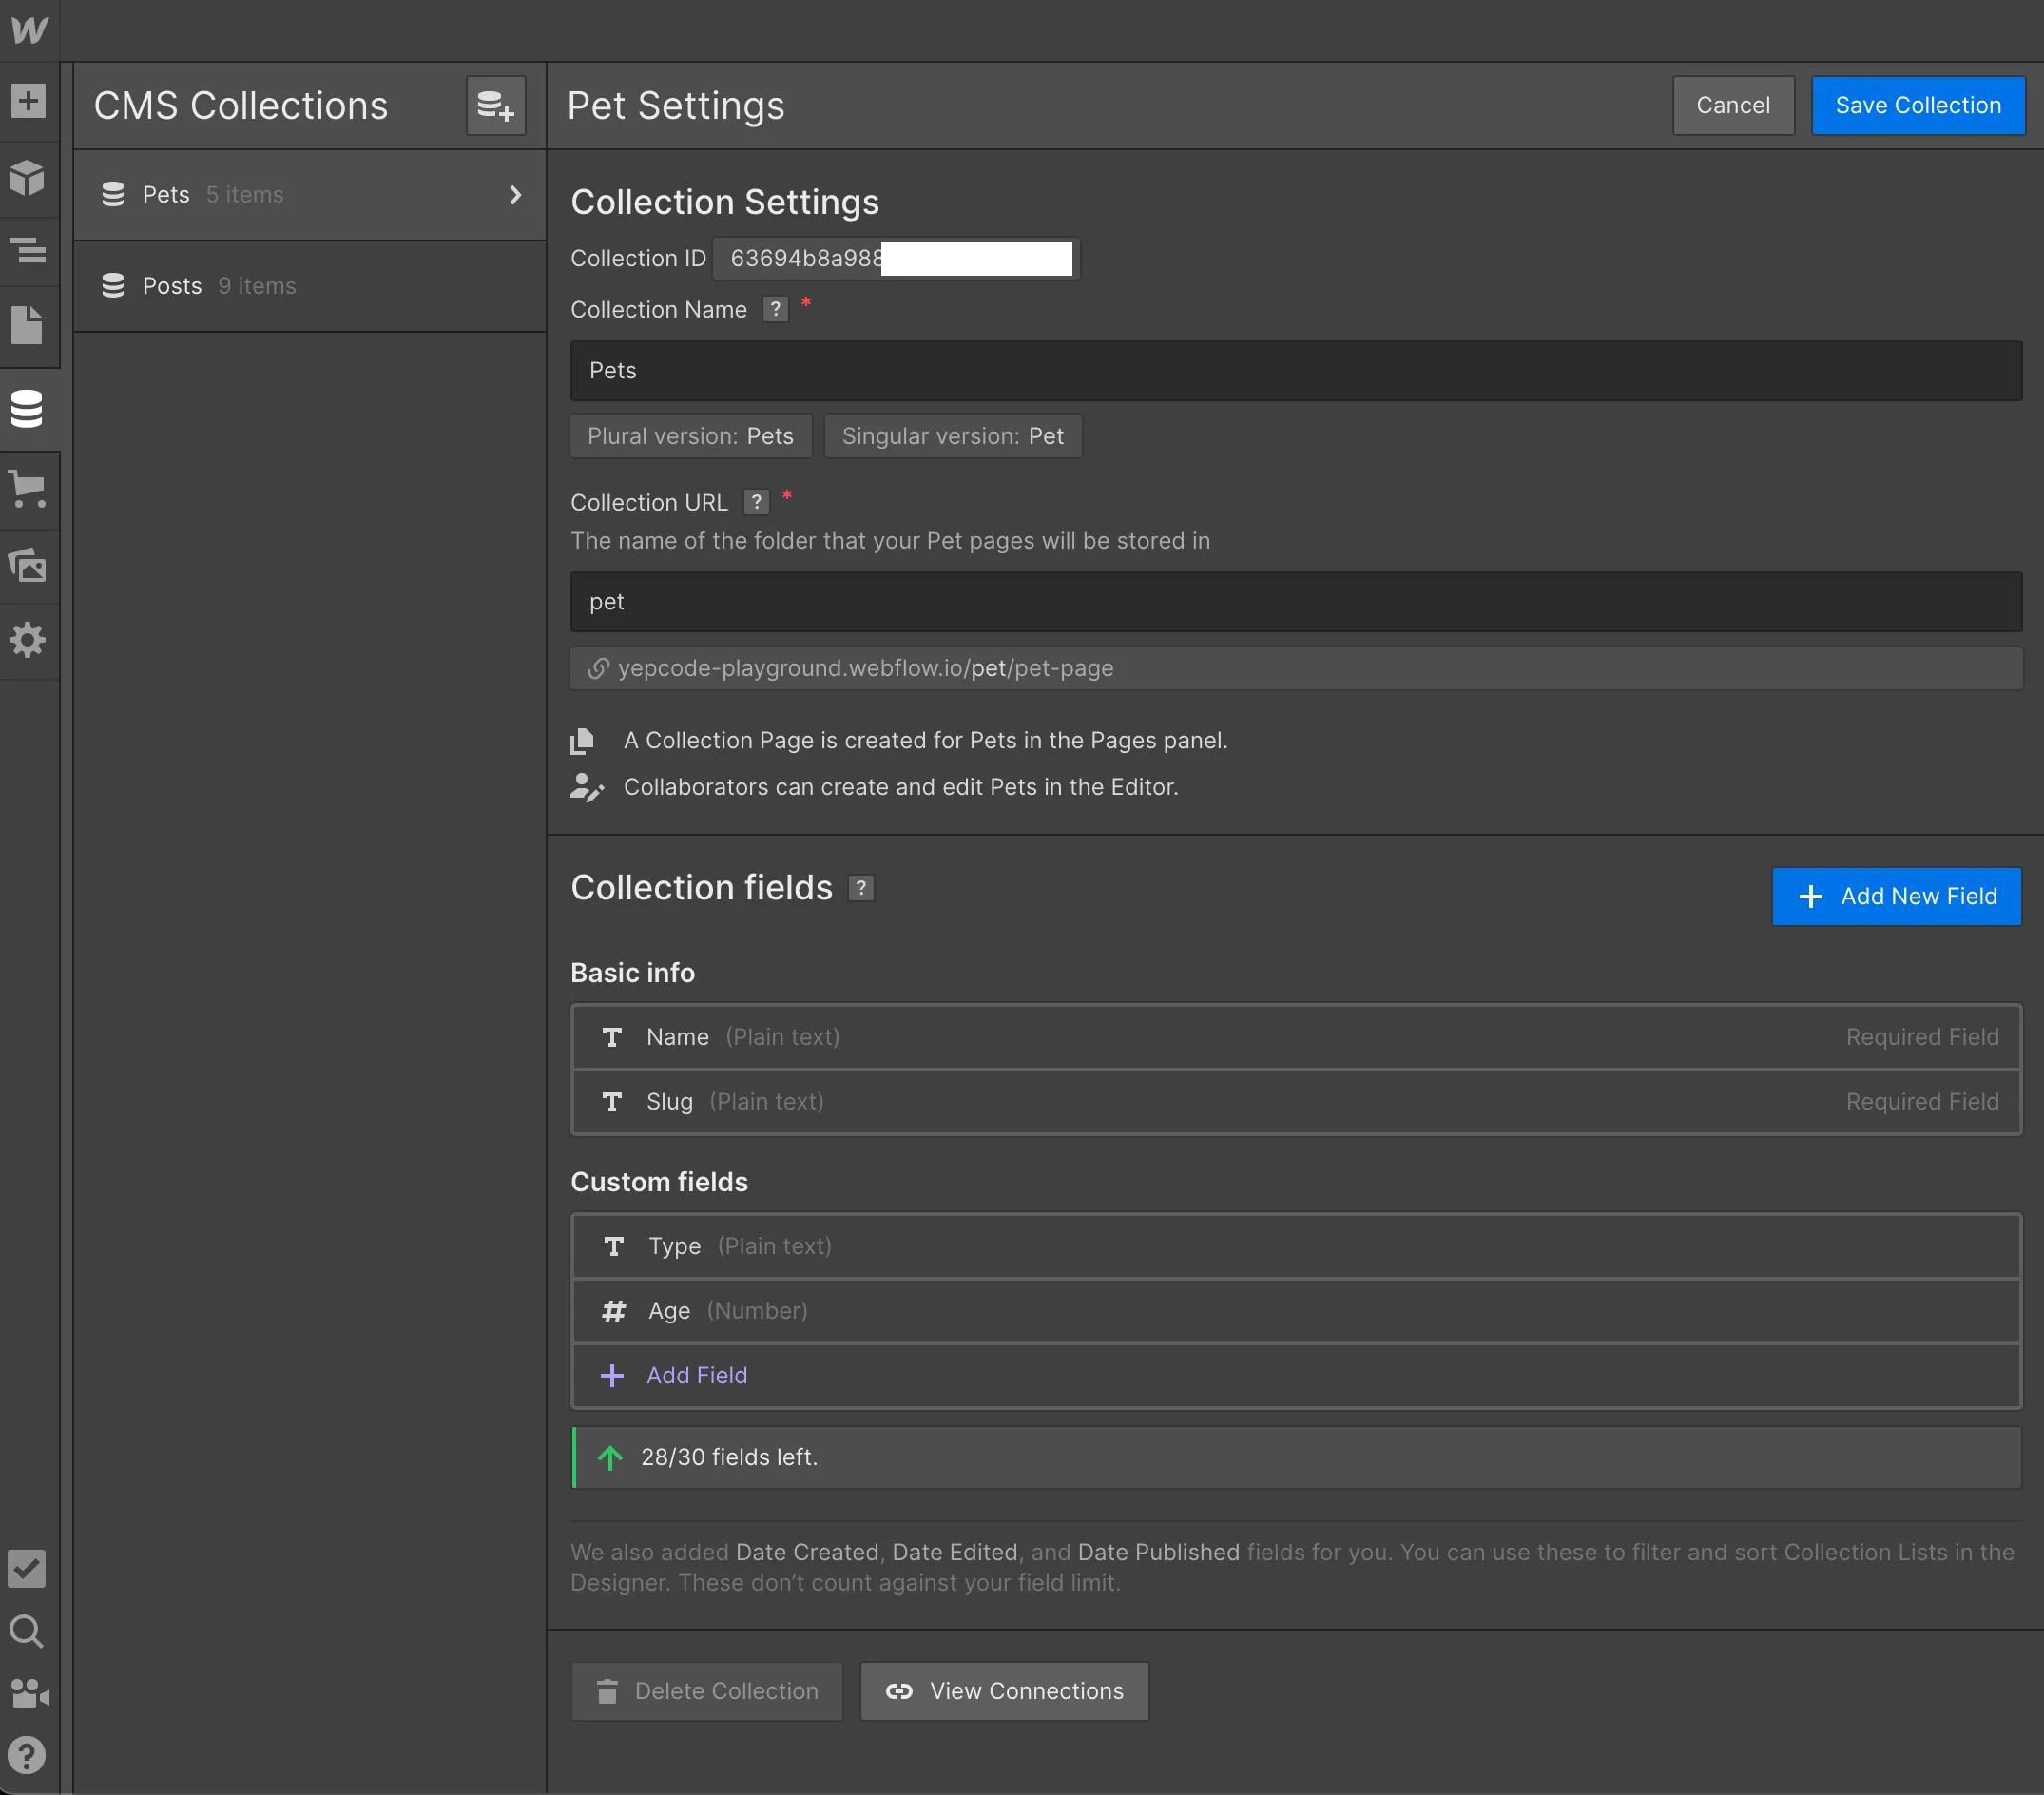
Create the CMS Entry
This is up to you. In our case, we are going to create a Pets collection.
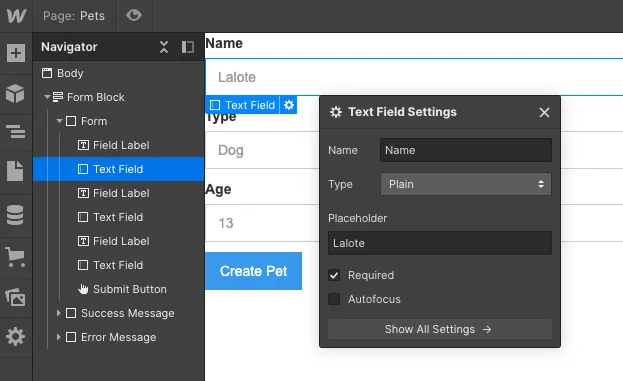
Build Webflow form
Create a new page adding the form. Include a field for each CMS Entry attribute, taking care to use the same name.
Create the YepCode process
Go to your YepCode account (you may create one for FREE), and create a new process using the following source code.
This code example uses deprecated credentials:
const webflow = yepcode.integration.webflow("my-webflow");Follow this guide to migrate your credentials.
const _ = require('lodash');
const { context: { parameters } } = yepcode
// TODO: Set your CMS collection id (it's available in Collection Settings window)const YOUR_COLLECTION_ID = "6366c9..."
console.log(`Received execution parameters`, parameters)
const formData = parameters.data
const webflow = yepcode.integration.webflow('my-webflow');
function toLowerKeys(obj) { return Object.keys(obj).reduce((accumulator, key) => { accumulator[key.toLowerCase()] = obj[key]; return accumulator; }, {});}
const createCMSItemBody = { collectionId: YOUR_COLLECTION_ID, fields: { ...(_.mapKeys(formData, (v, k) => k.toLowerCase())), "_archived": false, "_draft": false }}
console.log(`Creating Webflow CMS item with parameters`, createCMSItemBody)
await webflow.createItem(createCMSItemBody, { live: 'true' })
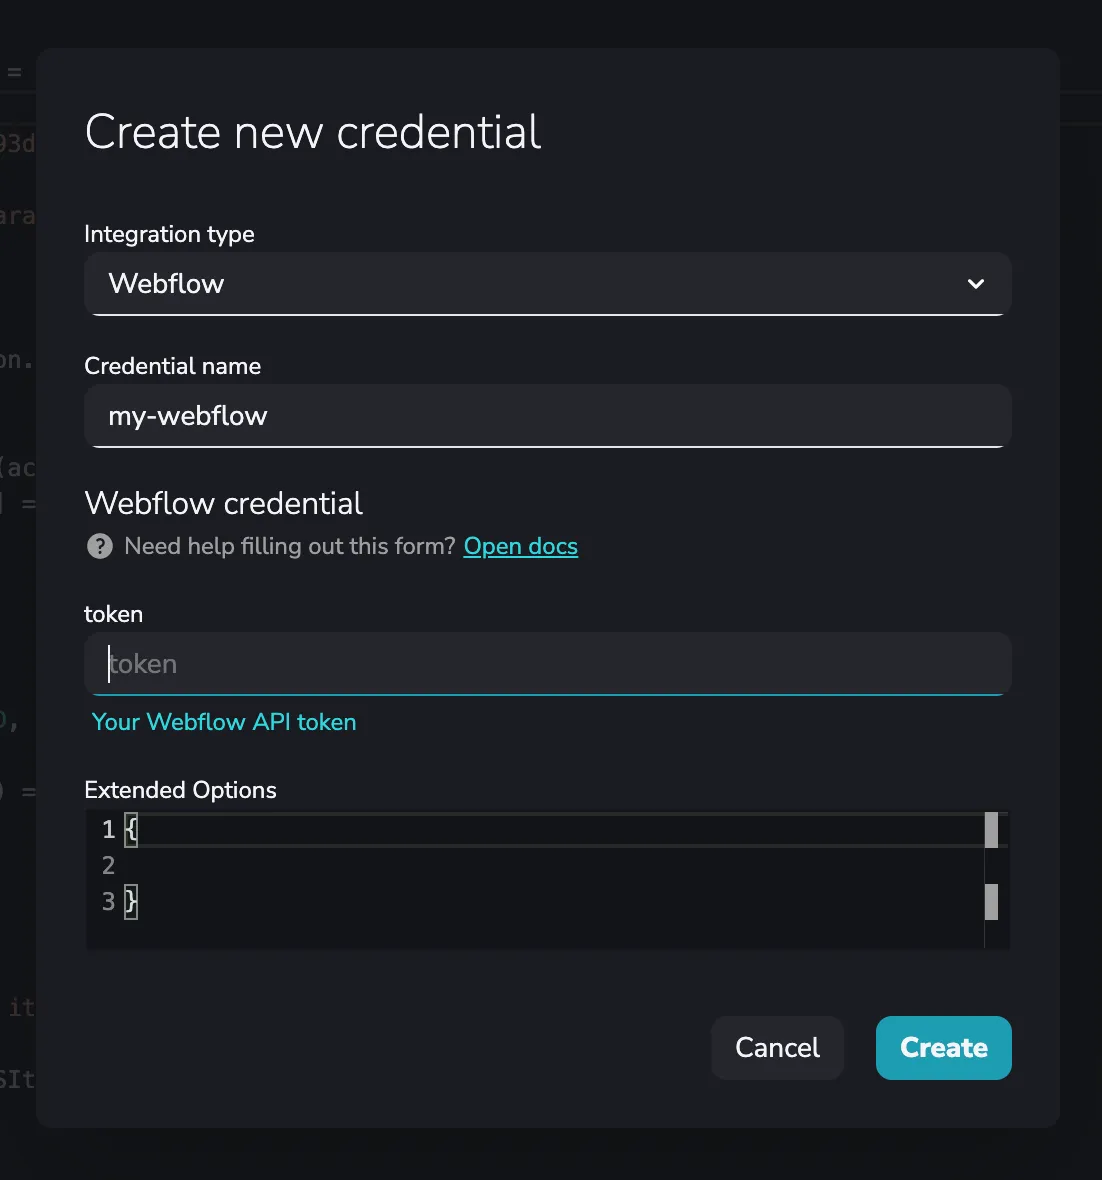
console.log(`Done 🚀`)You should create a new Webflow credential with name my-webflow, and you must generate an API key for a site. To do that, open the site in the dashboard and navigate to the “Settings” pane. There is a section titled “API Access”, where you can generate a new API key that must be provided in the token field.
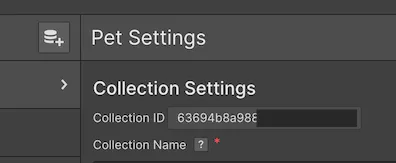
You should also configure your CMS collection ID, that is available in your CMS collection page:
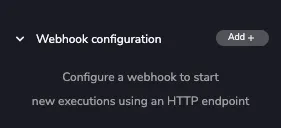
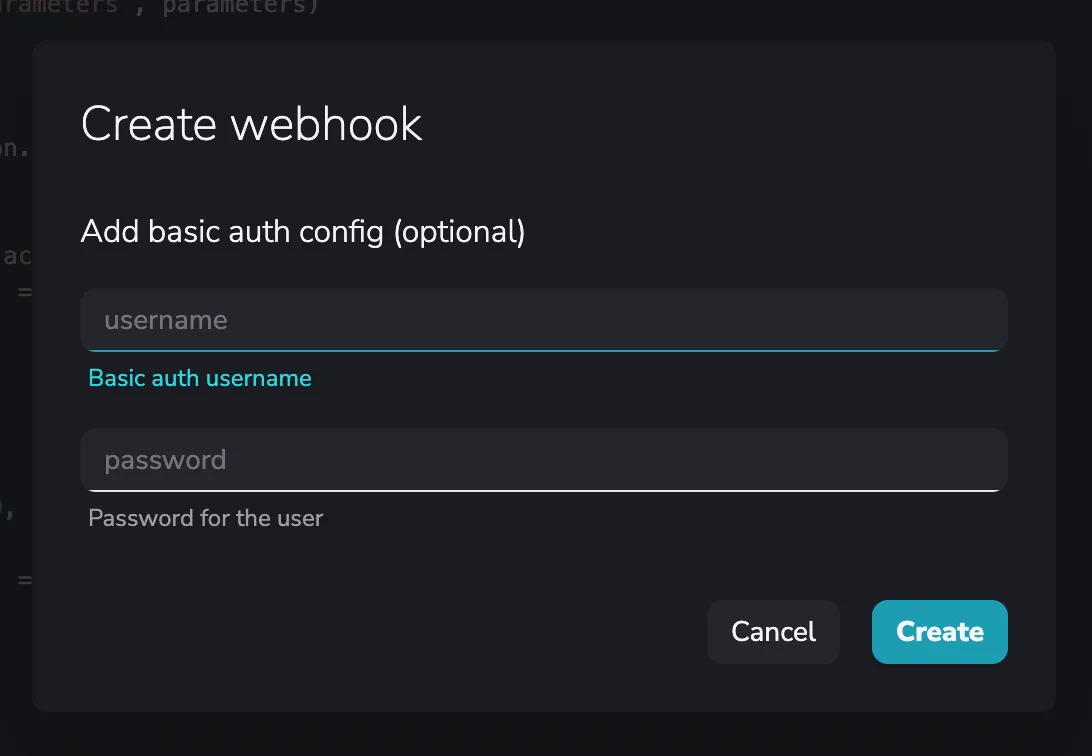
After that, you should create a webhook for this process, in order to be called from Webflow:

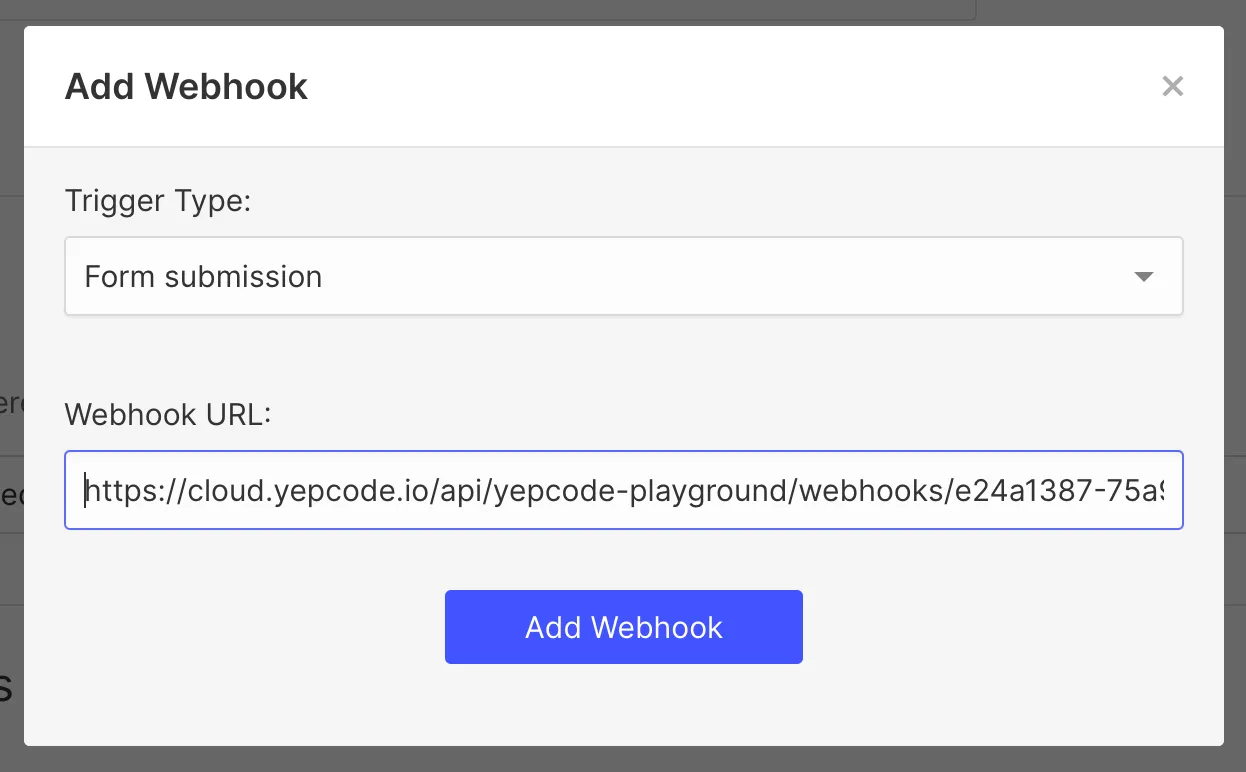
Configure Webflow to call the YepCode webhook with each form submission
Go to your project Integrations settings:

And create a new webhook for each Form submission. The URL to be used should be the one that YepCode provides with the webhook creation.
And that’s it!
Just publish your Webflow site and visit the form page. Each submission will instantly create the CMS entry.
Next steps
This was just a sample use case, but you could complicate it as much as needed, adding more login to the YepCode process: retrieve information from any other service, also store the information in one external database ,etc
Thank you for reading :) and…
Happy coding!