How to Create and Use Custom MCP Tools in YepCode

Turn your code into AI-powered tools.
YepCode MCP tools let you turn any Python or JavaScript function into a cloud-powered action—designed to be executed by any AI platform (like Cursor, Claude, or OpenAI) once your MCP server is configured and accessible.
If you can code it, you can make it a tool—data processing, API calls, or real-world actions. The possibilities are endless, especially when LLMs can trigger your logic on demand.
In this post, you’ll learn how to:
- Build a custom MCP tool in YepCode
- Define its inputs and outputs
- Use it from automations or with frameworks like crewAI
For more about MCP tools, see the official documentation.
Why MCP Custom Tools?
YepCode MCP tools are more than just code—they’re reusable, cloud-executed functions that can be called from anywhere, by anyone (or anything) you authorize.
- Reusable: Write your logic once, use it in many workflows or projects.
- Cloud-powered: No need to redeploy or manage infrastructure—just update your tool in YepCode.
- Empower LLMs and agents: Let AI models and automations trigger real-world actions, not just make suggestions.
Imagine an LLM that can not only answer questions, but also fetch data, run calculations, or trigger workflows—MCP tools make this possible.
With MCP tools, your code becomes a living API—ready to power automations, agent workflows, and LLM-driven solutions.
Prerequisites
Before you start, make sure you have:
- A YepCode account (free tier is enough)
- Basic Python or JavaScript skills
- An idea for a tool (e.g., a calculation, API call, or data transformation)
No local environment or server setup required—everything runs in the cloud!
Step-by-Step: Creating a YepCode Custom MCP Tool
Follow this checklist to create your first MCP tool:
- Create a new process in YepCode (official docs)
- Add your logic in Python or JavaScript
- Define your input and output parameters
- Add the
mcp-tooltag in the process settings - Save and version your tool as usual
If you don’t tag your process as
mcp-tool, it won’t show up as a mcp tool for LLMs or agents to use!
Now your tool is ready to be discovered and called by AI agents, automations, or LLMs.
Example: Asteroid Impact Energy Calculator
You can edit and test your tool right in the YepCode web UI. Copy-paste this code and try it with your own parameters!
Here’s a Python example that calculates the energy released by an asteroid impact, given its diameter, speed, and angle.
import math

def calculate_impact_energy(diameter_km, speed_kms, impact_angle_degrees):    # Convert diameter to meters    diameter_m = diameter_km * 1000    # Calculate mass assuming a density of 3000 kg/m³ for stony asteroids    radius_m = diameter_m / 2    volume_m3 = (4 / 3) * math.pi * radius_m**3    density_kgm3 = 3000  # kg/m³ for stony asteroid    mass_kg = volume_m3 * density_kgm3    # Calculate kinetic energy in Joules    speed_ms = speed_kms * 1000    kinetic_energy_joules = 0.5 * mass_kg * speed_ms**2    # Convert Joules to megatons of TNT (1 megaton TNT ≈ 4.184e+15 Joules)    impact_energy_megatons = kinetic_energy_joules / (4.184e15)    return impact_energy_megatons

try:    parameters = yepcode.context.parameters    diameter_km = parameters["diameter_km"]    impact_speed_kms = parameters["impact_speed_kms"]    impact_angle_degrees = parameters["impact_angle_degrees"]
    # Calculations    impact_energy = calculate_impact_energy(        diameter_km, impact_speed_kms, impact_angle_degrees    )    return impact_energy
except KeyError as e:    return {        "body": {            "message": f"Missing required parameter: {e.args[0]}",            "solution": "Please provide all required parameters in the request body as a JSON object. The required parameters are: diameter_km, impact_speed_kms, impact_angle_degrees",        },        "status": 400,    }
Parameters:
diameter_km(float): Asteroid diameter in kilometersimpact_speed_kms(float): Impact speed in kilometers per secondimpact_angle_degrees(float): Impact angle in degrees
This tool will return the estimated impact energy in megatons of TNT, or a helpful error message if any parameter is missing.
Parameter Schema (JSON):
This is how you define the tool’s input parameters in YepCode in the source code editor:
{ "title": "Calculate asteroid impact energy", "type": "object", "properties": { "impact_speed_kms": { "title": "Asteroid impact speed in kms", "type": "number" }, "diameter_km": { "title": "Asteroid diameter in km", "type": "number" }, "impact_angle_degrees": { "title": "Asteroid impact angle in degrees", "type": "number" } }, "required": [ "impact_speed_kms", "diameter_km", "impact_angle_degrees" ]}Testing Your MCP Tool with crewAI
Once you’ve configured your MCP server and created your tool, testing it with crewAI is straightforward.
- Follow the steps in the related blog post to set up an example with crewAI.
- Your new MCP tool should show up automatically in crewAI’s available tools list.
- Agents will use your tool as needed, based on their configuration and tasks.
To test it, you just need to run:

crewAI run output using your custom MCP tool.
Testing Your MCP Tool in Cursor
Now let’s connect your new MCP tool to an AI platform! Here’s how to configure the YepCode MCP server in Cursor so your tool is available to LLMs and automations.**Get your YepCode MCP server URL and API token:**
- Go to YepCode Cloud > Settings > API credentials to create a new API token.
- Your MCP server URL will look like:
https://cloud.yepcode.io/mcp/<your_api_token>/sse - For more details, see the YepCode MCP server repo.

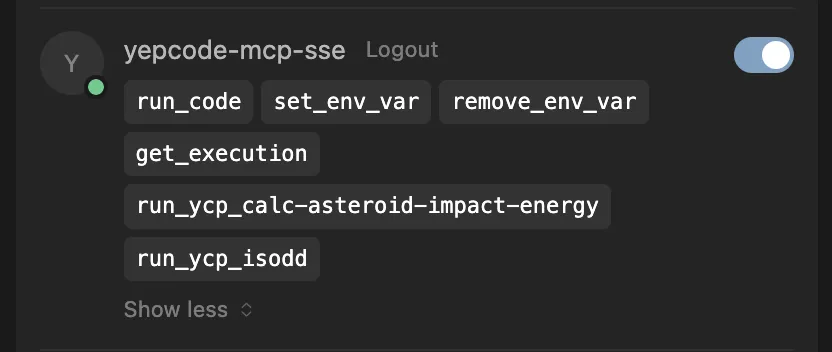
Don’t forget to replace
<your_api_token>with your actual API Token in the MCP server URL. Once connected, you’ll see all the tools you have available!
Best Practices
- Keep tools focused and atomic
- Use descriptive names and docs
- Handle errors gracefully
Pro Tip: Keep your tools small and focused—one tool, one job—for easier maintenance and reuse.
Conclusion
MCP custom tools in YepCode let you turn any code into a reusable, cloud-powered action—perfect for LLMs, agents, and automations.
Curious to try this for your own API or use case? Contact us — we’d love to hear what you’re building.