Getting started
Enable YepCode form
The first step is to create your YepCode process and configure the input parameters that will define form fields.
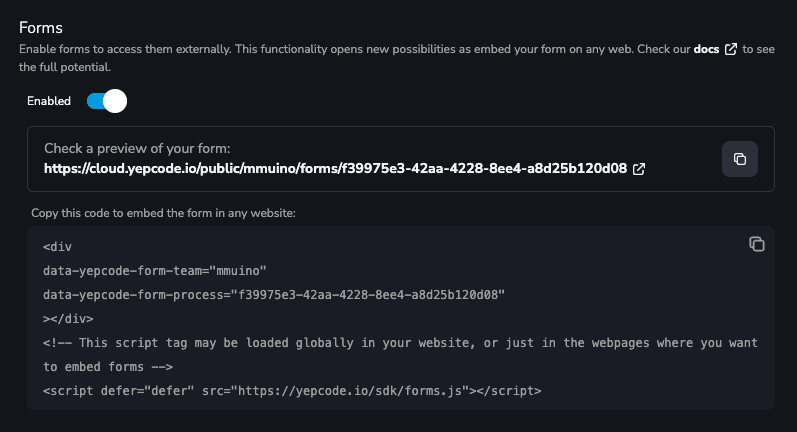
tip
The input parameters configuration for the image on the Overview page would be:
{
"title": "Sign up form",
"type": "object",
"properties": {
"name": {
"title": "Your name",
"type": "string"
},
"email": {
"title": "Your email",
"type": "string",
"format": "email"
},
"password": {
"title": "Your password",
"type": "string",
"isSensitive": true,
"ui": {
"ui:placeholder": "Use a secure password"
}
},
"yourIdDocument": {
"title": "Upload your id document",
"type": "string",
"ui": {
"ui:widget": "file"
}
},
"plan": {
"title": "Which plan do you want to use",
"type": "string",
"ui": {
"ui:widget": "radio"
},
"enum": ["FREE", "STARTER", "GROWTH"],
"default": "STARTER"
}
},
"required": ["name", "email", "password"],
"embedFormOptions": {
"loadingOverlayContent": "Creating new user..."
}
}
Having these input parameters configured, is time to enable the forms feature for it. Just visit the process Dashboard and enable the Forms
flag.

info
The URL that you'll see, allows you to visit a public page with your embebed form.
You may share this URL with anyone that you wants to start the related process execution.