YepCode Landings
YepCode allows to manage countless variations of landing pages effortlessly.
Just create customizable HTML layouts with replaceable tokens and then generate langing instances provided the needed information.
For a comprehensive demonstration of how YepCode Landings works, watch the full demo video below:
Claim Your Access
Section titled “Claim Your Access”Access to YepCode Landings is exclusive to some of our paid plans. If you’re interested in trying it out, simply fill this form:
Create your first template
Section titled “Create your first template”Just use the Create button and the form to create a template will be shown:

Each template has the following information:
Name and slug
Section titled “Name and slug”Just some descriptive information.
HTML Source Code
Section titled “HTML Source Code”It’s the full HTML code that will be rendered when someone visit the landing.
You can include any necessary external assets such as CSS, JavaScript files, and images within your HTML code. If required, we can provide web storage space to upload your external assets.
Your HTML code can utilize replaceable tokens using the Mustache syntax. These tokens will be dynamically replaced with values provided during landing creation.
<!DOCTYPE html><html lang="en">  <head>    <meta charset="UTF-8" />    <title>Hello, {{name}}!</title>    <style>      body {        background-color: #f0f0f0;        font-family: Arial, sans-serif;        margin: 0;        display: flex;        justify-content: center;        align-items: center;        min-height: 100vh;      }
      h1 {        font-size: 5em;        color: #b84ef4;        text-align: center;      }    </style>  </head>  <body>    <h1>Hello, {{name}}!</h1>  </body></html>
Properties schema.
Section titled “Properties schema.”The tokens used in your HTML code must be defined in these properties schema, that uses the JSON Schema form specification, and the library we use to render the form is react-jsonschema-form.
The slug and name attributes are mandatory, and inside the variables node, you coud add as may attributes as you could need (in this sample we only ask for a string field for the name):
{ "title": "Template configuration", "type": "object", "properties": { "slug": { "type": "string", "title": "URL path", "pattern": "^[a-z0-9]+(?:-[a-z0-9]+)*$" }, "name": { "type": "string", "title": "Landing name" }, "variables": { "title": "Template variables", "type": "object", "properties": { "name": { "title": "Your name", "description": "This is a variable that will be replaced in the landing render", "type": "string" } }, "required": ["name"] } }, "required": ["slug", "name"]}Here you have a more complex sample, including text areas and also a input type file, that will allow you to upload files when you create the landings:
{ "title": "Template configuration", "type": "object", "properties": { "slug": { "type": "string", "title": "URL path", "pattern": "^[a-z0-9]+(?:-[a-z0-9]+)*$" }, "name": { "type": "string", "title": "Landing name" }, "variables": { "title": "Template variables", "type": "object", "properties": { "title": { "title": "Page meta title", "type": "string" }, "description": { "title": "Page meta description", "type": "string" }, "heading_title": { "title": "Heading title", "type": "string" }, "heading_text": { "title": "Heading content", "type": "string", "ui": { "ui:widget": "textarea" } }, "heading_image": { "type": "string", "format": "file", "title": "Heading image", "isTransient": true } }, "required": ["title", "description", "heading_title", "heading_text"] } }, "required": ["slug", "name"]}Create your first landing
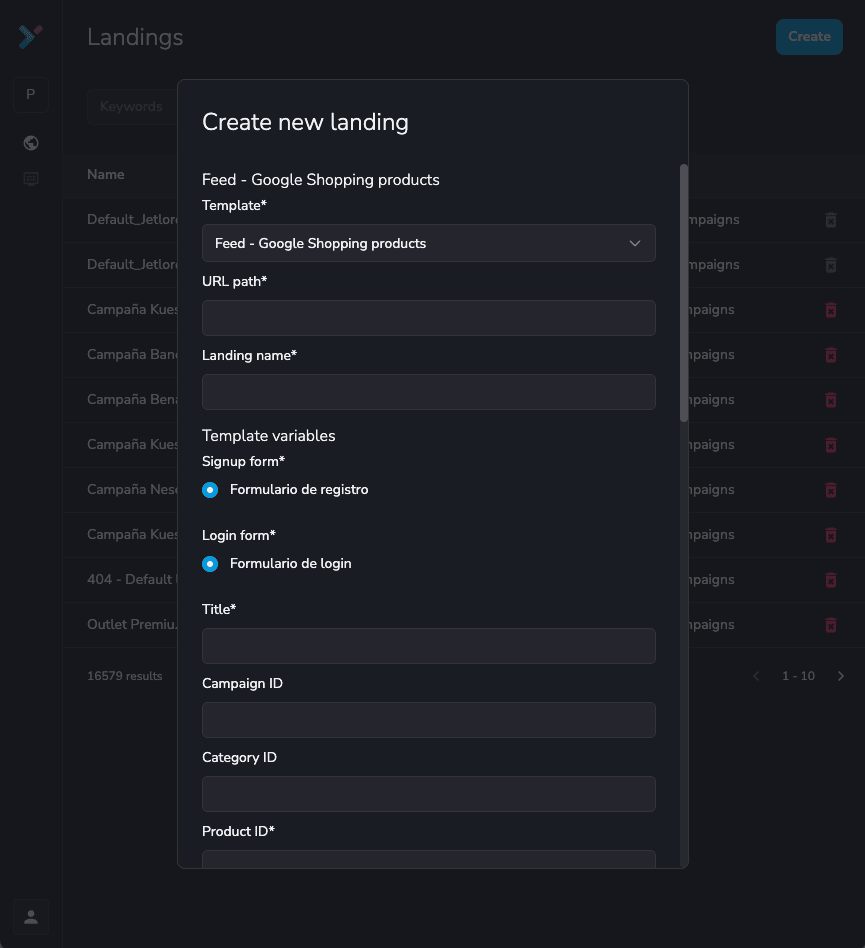
Section titled “Create your first landing”Once you’ve defined your template layout and properties, you can begin creating landings.
Simply select the desired template, and the associated properties will be displayed:
The URL path will determine the availability of your landing page. By default, it will be hosted under a YepCode domain:
https://landings.yepcode.io/{{your-workspace-id}}/{{your-landing-url-path}}/But you can configure a CNAME record so that your landing page will also be accessible under your own domain.
Do you need something more
Section titled “Do you need something more”Just drop us a message if you think that YepCode Landings cover your needs you but you need some kind of help.