Let's do the Hello World
In the world of programming tools, a Hello World sample is often the key to resolving initial doubts.
Watch this brief video during our onboarding tour to get an overview…
…but the best option is to create your account and implement it yourself!
To get started, log in to your account at http://cloud.yepcode.io/ (if you don’t have an account yet, you can create one in seconds!).
Navigate to your processes list page, which might be initially empty, but here you could see any previously created processes.
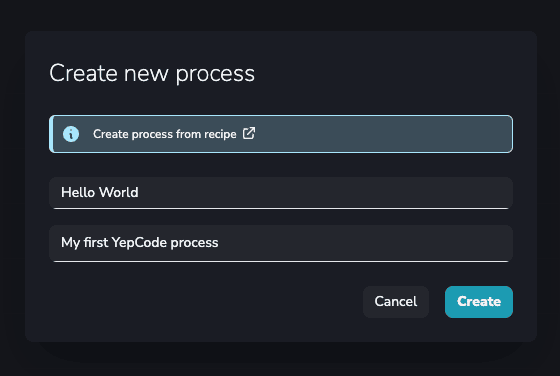
Click on the New button and provide a name and description for this new process. For this sample, we’ll use JavaScript as the language:
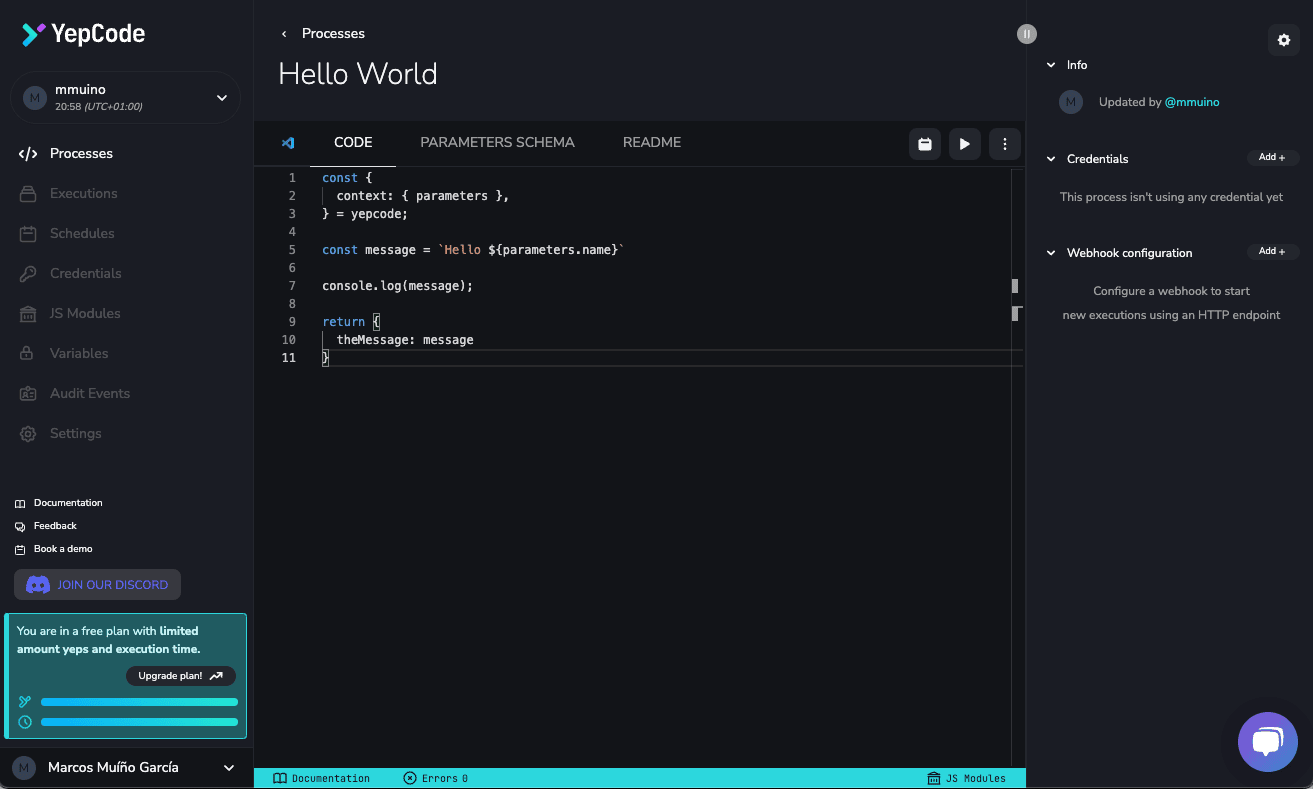
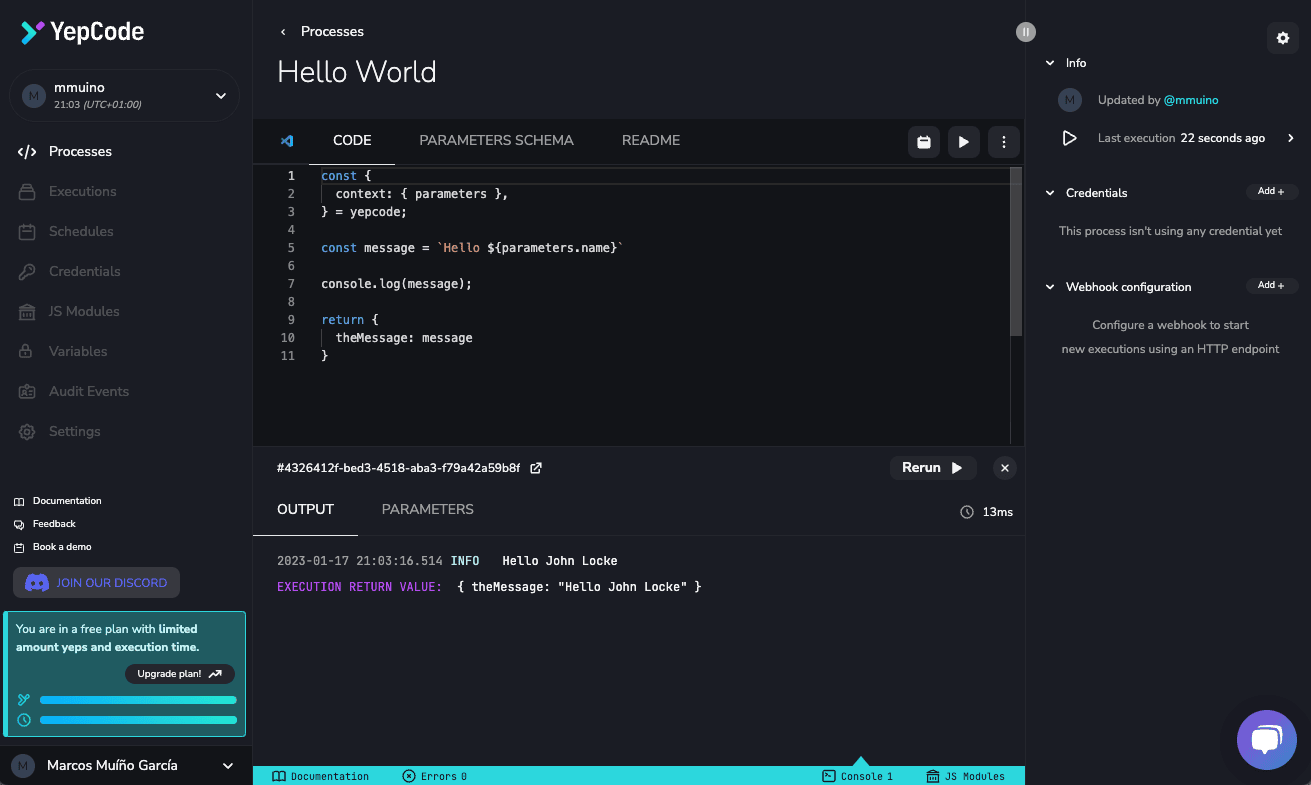
Now you can input your source code into our editor. For this sample, you can use the following snippet:
const {  context: { parameters },} = yepcode;
const message = `Hello ${parameters.name}`;
console.log(message);
return {  theMessage: message,};
parameters = yepcode.context.parameters
message = f"Hello ${parameters['name']}."
print(message)
return { "theMessage": message,}You should see something like this:
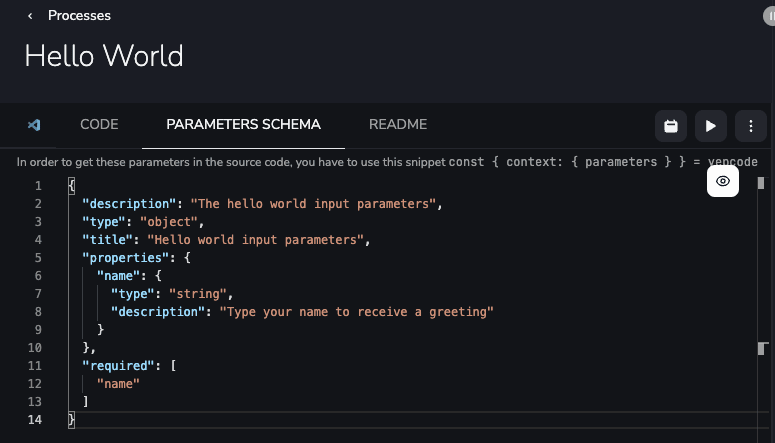
As you might guess, YepCode supports input parameters. To configure them, go to the parameters tab and add this JSON code in the input parameters editor:
{ "description": "The hello world input parameters", "type": "object", "title": "Hello world input parameters", "properties": { "name": { "type": "string", "description": "Type your name to receive a greeting" } }, "required": ["name"]}It should look like this:
Press the Save button and you’re done with your process, let’s run it! 🚀
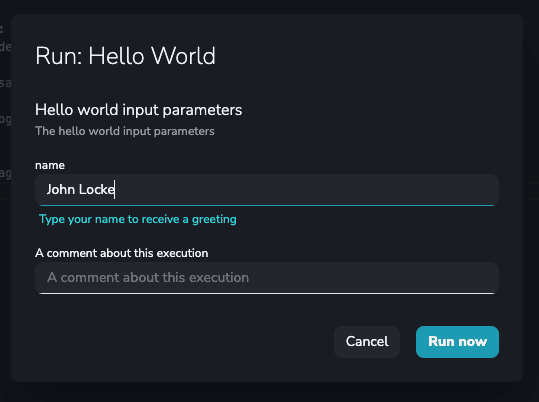
There are multiple ways to run the process, but in this case, we’ll go with the simplest one. Just press the run button and provide the input parameters:
After that, you’ll be redirected to the new execution page, where you can check how the execution is going and review the process output (in real-time if the process is still active):
Congratulations! Your first YepCode process is up and running.
Now let’s move on to more complex tasks!